
Adyen Payment Setup
Overview
MediaStore SDK supports payments with Adyen including card payments with 3D Secure support, Apple Pay, Google Pay, iDEAL and Sofort. It means that if Cleeng is your MoR (Merchant of Record) you can simply call our API for these payments and you don't need to worry about connector configuration.
Good to know
If you want to use MediaStore SDK Components - our recommended ready-to-use solution - please refer to Components Library Overview - Purchase or Checkout components or directly to our NPM package.
If you prefer API-based option, Cleeng Adyen integration allows you to easily turn on new payment methods with limited development or testing. Cleeng provides a set of endpoints to integrate with Adyen payment methods.
- Create Adyen payment session
- Payment with Adyen
- Finalize payment with Adyen
- Add Adyen payment details
- Finalize add Adyen payment details
Please migrate to the new endpoints if you are using the legacy version of API :
See below for the migration guide.
The guide below shows step-by-step how to build the integration from the front-end perspective.
Supported payment methods
Please see the table below for the supported Adyen payment methods.
| Supported Payment Method | Web |
|---|---|
| Apple Pay | ✓ (available on Safari browser; for more information, see Compatibility) |
| Card (with 3D Secure support) | ✓ |
| Google Pay | ✓ |
| iDEAL | ✓ |
| Sofort | ✓ |
Migration guide
If you have been using legacy endpoints (Payment with Adyen, Add Adyen payment details) to support Adyen Payments, you should follow the steps below to migrate to the new Adyen payment setup:
- Replace your old Card component with the Adyen Drop-in component (see the Drop-in integration guide below).
- Replace requests to the deprecated endpoints with the new Adyen endpoints.
- Test the new solution on the sandbox.
- When all payment methods are tested successfully, check the go-live checklist and release the implementation to production.
Prerequisites
The following three points are the general prerequisites to start building Adyen setup with the Adyen Drop-in.
- Payment method
- Webhooks and dunning action settings Important! This is required for recurring payments to work.
- Allowed origins & domains
Once the Drop-in is implemented, you can proceed with configuring a specific payment method. For details of additional configuration, see the specific section: Card setup and 3D Secure setup, Apple Pay setup, Google Pay setup, iDEAL setup, and Sofort setup.
1. Payment method
Make sure you have any Adyen payment method enabled. To do so, call Fetch payment method ids.
You can add new payment methods by reaching to our Broadcaster Success Specialists team.
Please note that payment methods are separately added per environment (sandbox, production).
It is recommended that you first add a payment method to your sandbox environment.
Only after testing and completing the go-live checklist, you should enable the payment method in the production environment. Please note that once it is enabled, it is immediately visible in the production environment.
To avoid it being immediately visible, you can use filtering.
2. Webhooks and dunning action settings
Configure Dunning actions and webhooks for different payment methods.
Subscribe to webhooks / verify the setup with the List of endpoints.
Remember to configure dunning action settings and webhooks for each payment method that you want to use.
Sofort and iDEAL exception: You don’t need to subscribe to subscriptionReadyForPaymentCapture webhook for these payment methods. iDEAL and Sofort capture payments automatically.
3. Allowed origins & domains
Reach out to our Broadcaster Success Specialists team (BSS) to provide the necessary information on allowed origins and domains. Please note that validation might take one or two days (e.g. for Google Pay) depending on the payment method.
Tip
When contacting Broadcaster Success Specialists team (BSS) please provide both: the payment method and the respective information for this payment method (a list of origins or domains).
The table below shows what information needs to be provided for different payment methods:
| Payment method | What to provide to BSS team |
|---|---|
| Card | Add origin to allowed origins for Adyen card payment. Provide a list of your origins, where you want to use an Adyen Drop-in (with information about what environment they should be added to: sandbox, production or both). Provide an origin name with http:// or https:// (depending which one is going to be used). |
| Apple Pay | Add a domain association file to your website (see here for details). Once added: provide a domain list where you will use an Apple Pay payment (with distinction: sandbox/production). |
| Google Pay | Provide a list of domains where you will use Google Pay (production only). Please note that you will also need to provide screenshots showing the purchase flow (see more in the Prerequisites section). |
| iDEAL | No additional data needed. |
| Sofort | No additional data needed. |
Drop-in integration
Cleeng partnered with Adyen to develop a tailored solution based on their standard Drop-in (version 5.31.3). It is a pre-built user interface element that allows you to accept payments on your website by displaying all payment methods as a list.
The payment flow is the same for all payments:
- The customer goes to the checkout page.
- Your server uses the customer order details to create a payment session.
- Your front-end application creates an instance of Drop-in using the session data from the server.
- Drop-in:
- shows the available payment methods,
- collects the customer's payment details,
- handles additional actions,
- and presents the payment result to the customer.
To integrate a Drop-in, follow these steps:
Create a payment session
A payment session is a resource with information about a payment flow that is initiated by the customer. It has all the information required by Drop-in to handle all the steps of a payment flow.
To create a payment session use the Create Adyen payment session endpoint.
Note: Payment session expiry date is set to 1 hour after session creation.
The response contains:
sessionData: the payment session data you need on your front end.id: a unique identifier for the session data.shopperStatement: the name of the Merchant. Pass it to the Drop-in, so Apple Pay and Google Pay will present it as a merchant.amount: object required for Apple Pay and Google Pay configuration.countryCode: country code required for Apple Pay and Google Pay configuration.paymentMethods: array of all payment methods. Configuration objects from this array are useful for Apple Pay and Google Pay configuration.- The request body.
Set up Drop-in
This stage consists of four steps:
- Use the Adyen Web npm package
- Create the container element for Drop-in
- Create a configuration object
- Initialize the Drop-in
Use the Adyen Web npm package
Install the Adyen Web Node package.
npm install @adyen/adyen-web --save
Import Adyen Web into your application. You can add your own styling by overriding the rules in the CSS file.
import AdyenCheckout from '@adyen/adyen-web';
import '@adyen/adyen-web/dist/adyen.css';
Create the container element for Drop-in
Create a DOM container element on your checkout page where you want Drop-in to be rendered. Make sure to give the container element a descriptive id.
<div id="dropin-container"></div>
If you are using JavaScript frameworks such as Vue or React, make sure that you use references instead of selectors and that you don't re-render the DOM element.
Create a configuration object
Create an object for the global configuration of your Drop-in integration. This section shows the required and recommended parameters.
| Parameter name | Required | Description |
|---|---|---|
session | yes | The payment session object from your call to /connectors/adyen/sessions. Contains a session.id and session.sessionData. |
clientKey | yes | Client key is generated by Cleeng and it can be used by each domain on the 'allowed list'. Contact us to add your origin to the allowed ones. Then use this value for sandbox: test_I4OFGUUCEVB5TI222AS3N2Y2LY6PJM3K or live_BQDOFBYTGZB3XKF62GBYSLPUJ4YW2TPL for production |
environment | yes | Use "test". When you're ready to accept live payments, change the value to "live". |
onSubmit(state, component) | yes | The function that will trigger the payment. Required for integration with Cleeng. Make a request to /connectors/adyen/initial-payment inside onSubmit function. |
onError(error) | no | Create an event handler, called when an error occurs in Drop-in. |
paymentMethodsConfiguration | no | Configuration for specific payment methods. Refer to specific payment method section (Apple Pay, Google Pay) for more details. |
analytics.enabled | no | Indicates if you're sending analytics data to Adyen. Default: true. |
const configuration = {
  environment: 'test', // Change to 'live' for the live environment.
  clientKey: 'test_I4OFGUUC...', // Public key used for client-side authentication
  analytics: {
    enabled: true // Set to false to not send analytics data to Adyen.
  },
  session: {
    id: 'CSD9CAC3...', // Unique identifier for the payment session.
    sessionData: 'Ab02b4c...' // The payment session data.
  },
  onError: (error, component) => {
      console.error(error.name, error.message, error.stack, component);
  },
  paymentMethodsConfiguration: {
    card: {
      hasHolderName: true,
      holderNameRequired: true
    }
  },
  onSubmit: submitFn
};
See also the optional configuration for Drop-in and Adyen Checkout element.
Initialize the Drop-in
- Create an instance of AdyenCheckout using the configuration object you created.
- Create an instance of Drop-in and mount it to the container element you created.
// Create an instance of AdyenCheckout using the configuration object.
const checkout = await AdyenCheckout(configuration);


// Create an instance of Drop-in and mount it to the container you created.
const dropinComponent = checkout.create('dropin', {
  onSelect // required. You should update order with proper paymentMethodId, each time this function is called
});
dropinComponent.mount('#dropin-container');

Adyen Drop-in component
Make a payment
In the onSubmit function you should call the /connectors/adyen/initial-payment endpoint.
The next steps depend on the response. If in the response you get:
paymentobject - the payment was completed and succeeded. You can present the success screen.actionobject - the payment was not completed yet, and additional actions need to be taken.
Handle payment outcome
Some payment methods like iDEAL, and some 3D Secure flows will redirect the customer back to your website. When the customer comes back to your website, show them the payment result, based on the /connectors/adyen/initial-payment/finalize response.
If the initial payment returns an action object, use the dropin.handleAction to proceed with the next steps of payment.
{
  "action": {
    "paymentMethodType": "scheme",
    "url": "https://test.adyen.com/hpp/3d/validate.shtml",
    "data": {
        "MD": "OEVudmZVMUlkWjd0MDNwUWs2bmhSdz09...",
        "PaReq": "eNpVUttygjAQ/RXbDyAXBYRZ00HpTH3wUosPfe...",
        "TermUrl": "https://example.com/checkout?shopperOrder=12xy..."
     },
     "method": "POST",
     "type": "redirect"
  }
}
Drop-in uses dropin.handleAction(action) to redirect the customer to the issuer page, e.g. to perform 3D Secure authentication.
When the customer completes authentication, he/she is redirected back to the returnUrl from the initial payment request. The redirect is via an HTTP GET and is appended with the Base64-encoded redirectResult.
GET /?shopperOrder=12xy...&&redirectResult=X6XtfGC3%21Y.... HTTP/1.1
Host: www.your-company.com/checkout
To verify the payment result, make another API request to /connectors/adyen/initial-payment/finalize.
Testing and going live
- Before going live, use the Adyen testing card to test your integration. We recommend testing each payment method that you intend to offer to your customers.
- Verify the payment result in Cleeng Dashboard.
- Switch from the sandbox to our production endpoints.
- Load Drop-in for live environment (see Create a configuration object).
Optional configuration
Apart from parameters defined within specific payment methods, you can pass additional parameters or use additional methods. Tables below present available parmeters and methods for AdyenCheckout instance and Drop-in.
const checkout = await AdyenCheckout({
    onError: () => {}, // Global configuration for onError
    paymentMethodsConfiguration: {
        card: {
            onError: () => {}, // onError configuration for card payments. Overrides the global configuration.
        }
    }
});

checkout.create('dropin', {
    onReady: () => {}, // Drop-in configuration only has props related to itself, like the onReady event. Drop-in configuration cannot contain generic configuration like the onError event.
});
Drop-in configuration
Parameters:
These parameters are specific to Drop-in and are only accepted on the Drop-in instance.
| Parameter name | Description |
|---|---|
openFirstPaymentMethod | When enabled, Drop-in opens the first payment method automatically on page load. Default: true. |
onReady() | It is called when Drop-in is initialized and is ready for use. |
onSelect(component) | Required. It is called when the customer selects a payment method. Update the order with the proper payment method ID on each onSelect call. To detect the selected payment method use component.type (possible values: card, googlepay, applepay). Once a selected payment method is returned (e.g. card), map it to a proper payment method ID in Cleeng. |
Methods:
| Method name | Description |
|---|---|
mount(selector) | Mounts the Drop-in into the DOM returned by the selector. The selector must be either a valid CSS selector string or an HTMLElement reference. |
unmount() | Unmounts the Drop-in from the DOM. We recommend to unmount in case the payment amount changes after the initial mount. |
closeActivePaymentMethod() | Closes a selected payment method, for example if you want to reset the Drop-in. |
Code sample:
import AdyenCheckout from '@adyen/adyen-web';
const checkout = await AdyenCheckout(configuration);
const dropin = checkout.create('dropin', {
       onSelect,
       openFirstPaymentMethod:
         !window.matchMedia('(max-width:991px)').matches
     });
dropin.mount(containerRef.current);
AdyenCheckout configuration
Parameters
The following parameters can be set on the AdyenCheckout main instance.
| Parameter name | Description |
|---|---|
amount | Amount to be displayed on the "Pay" button. It expects an object with the value and currency properties. For example, { value: 1000, currency: 'USD' }. |
locale | The language used in the Drop-in UI. For possible values, see the list of available languages. |
setStatusAutomatically | Set to false to not set the Drop-in status to 'loading' when onSubmit is triggered. Default: true. |
Events:
| Event name | Description |
|---|---|
onError(error) | Creates an event handler, called when an error occurs in Drop-in. |
onChange(state, component) | Creates an event handler, called when a change happens in the payment form. |
onSubmit(state, component) | Creates an event handler, called when the customer selects the "Pay" button and payment details are valid. |
onAdditionalDetails(state, component) | Creates an event handler, called when a payment method requires more details, for example for native 3D Secure 2, or native QR code payment methods. |
Code sample:
const configuration = {
     locale: 'en-US',
     environment: 'test',
     analytics: {
       enabled: true
     },
     session: {
       id,
       sessionData
     },
     clientKey: ‘test_…’,
     onSubmit: (state, component) => console.log(state, component),
     onAdditionalDetails: (state, component) => console.log(state, component),
     onError,
     paymentMethodsConfiguration: {
       card: {
         hasHolderName: true,
         holderNameRequired: true
       },
       applepay: {
         amount: {
	     value: 1000,
                 currency: "EUR"
         },
          countryCode: “US”,
         }
       },
       googlepay: {
         environment: ‘TEST’,
          amount: {
	     value: 1000,
                 currency: "EUR"
         },
       }
     }
   };
 const checkout = await AdyenCheckout(configuration);
Card setup
Prerequisites
- Reach out to the Cleeng Broadcaster Success Specialists team to add the payment method to your account in the sandbox environment and add your origin to allowed origins. In the email :
- add a list of your origins, where you want to use an Adyen Drop-In
- provide information about what environment they should be added to: sandbox, production or both
- provide an origin name with http:// or https:// (depending which one is going to be used).
- Make sure that you've already built a Drop-in integration and proceed with integration.
Configure Drop-in
You can create a configuration object with the following optional parameters:
| Parameter name | Description | Default |
|---|---|---|
hasHolderName | To show the input field for the cardholder name, set this to true. It is strongly recommended to increase the security of transactions. | false |
holderNameRequired | To make the cardholder name a required field (strongly recommended to increase the security of transactions), you need to set the holderNameRequired parameter to true.To show the field, you additionally need to set hasHolderName to true. | false |
positionHolderNameOnTop | To show the cardholder name field at the top of the payment form, set this to true. | false |
styles | To customize the card input fields, set a style object. For a list of supported properties, refer to Adyen documentation. | Refer to Adyen documentation. |
billingAddressRequired | To collect the customer's billing address and mark the fields as required, set this to true. | false |
billingAddressMode | If billingAddressRequired is set to true, you can set this to partial to require the customer's postal code instead of the full address. | If billingAddressRequired is false: none.If billingAddressRequired is true: full. |
minimumExpiryDate | If a customer enters an earlier date than specified here, they will see the following error: "Your card expires before check out date." Format: mm/yy |
If you want to add an optional configuration, include this in a configuration object. The following example shows how to configure Drop-in to collect the cardholder name and billing address as required:
const cardConfiguration = {
   hasHolderName: true,
   holderNameRequired: true,
   billingAddressRequired: true, // Set to true to show the billing address input fields.
};
If you created a cardConfiguration object, include this when creating a configuration object:
const configuration = {
  // ...  other required configuration
  paymentMethodsConfiguration: {
    card: cardConfiguration
  }
};
Set up 3D Secure
Once you have configured a Drop-in and tested your basic card integration, continue with 3D Secure Setup. 3D Secure is enabled in the production environment and it has to be implemented so that payments that require 3D Secure authentication are properly handled.
Test your integration
-
Before going live, use the Adyen test card numbers to test your integration.
-
Make sure that you have implemented 3D Secure.
-
When you are ready with your integration, reach out to the Cleeng Broadcaster Success Specialists team to turn on the card payment method on production.
3D Secure setup
Overview
To complete a card payment with 3D Secure authentication, the customer needs to additionally verify their identity with their bank. 3D Secure 2.2 authentication can be performed in two ways:
- Native - customer authentication is performed within your website
- Redirect - customers are redirected to the card issuer’s site where they are asked to provide additional information to complete authentication
Native authentication is more user-friendly, but a redirect flow should be also supported to provide for the cases when authentication falls back to redirecting the customer to the card issuer’s site.
The default behavior in the sandbox and production environment is not to apply 3D Secure authentication, unless the issuing bank requires it to complete the authorization. By default, the native flow is preferred in both environments.
When making a card payment with native 3D Secure 2.2 authentication:
- Configure Drop-in to collect the card holder name.
- Provide the required 3D Secure parameters when making a payment request.
- Submit the authentication result if you receive an
actionobject from/connectors/adyen/initial-payment. - If the payment was routed to the 3D Secure 2.2 redirect flow, handle the redirect result.
- Test your integration.
For higher authentication rates, we recommend that you collect the card holder name and billing address for payments with 3D Secure authentication.
Prerequisites
Make sure that you've already built a Drop-in integration.
Configure Drop-in
When creating an instance of Drop-in, you can optionally specify:
| Field | Description | Default |
|---|---|---|
hasHolderName | Recommended. Set to true to show the input field for the card holder name. | false |
holderNameRequired | Recommended. Set to true to make the card holder name a required field. To show the field, you additionally need to set hasHolderName to true. | false |
name | String that is used to display the payment method name to the customer. | Depends on customer locale |
billingAddressRequired | Set to true to collect the customer's billing address. It is recommended for 3D Secure. | false |
const configuration = {
   paymentMethodsConfiguration: {
       card: { // Sample Drop-in configuration for 3D Secure
          hasHolderName: true,
          holderNameRequired: true,
          billingAddressRequired: false,
          name: 'Credit or debit card',
       },
       ...
   }
   ... // rest of the configuration object
};
Make a payment
When the customer selects to pay, the Drop-in calls the onSubmit event, which contains a state.data.
Make a /connectors/adyen/initial-payment request, specifying also parameters required for 3D Secure: origin, browserInfo, and recommended billingAddress.
const configuration = {
  onSubmit: (state, component) => {
    const {
      data: { paymentMethod, browserInfo, billingAddress }
    } = state;
    const origin = window.location.origin;
   	//make a request to /connectors/adyen/initial-payment passing paymentMethod, browserInfo, billingAddress, origin and orderId
  },
  ... // rest of the configuration object
};
Your next steps depend on whether the /connectors/adyen/initial-payment response contains an action object.
action.type | Description | Next steps |
|---|---|---|
No action object | The payment was finalized without the 3D Secure authentication. | Present payment result to the customer |
| threeDS2 | The payment qualifies for 3D Secure 2, and will go through the authentication flow. | Submit the challenge result (see Submit authentication results) |
| redirect | The payment is routed to the 3D Secure 2 redirect flow. | Handle the redirect result (see the section below) |
Submit authentication results
Drop-in uses dropin.handleAction(action) to perform the required authentication flow. If the issuer requires customer interaction, the Drop-in presents the challenge screen. The Drop-in then calls the onAdditionalDetails event.
Please note that the look and feel of the challenge screen is controlled by a card issuer.
Get the state.data from the onAdditionalDetails event, and pass it to /connectors/adyen/initial-payment/finalize.
{
	details: {
      threeDSResult: "eyJ0cmFuc1N0YXR1cyI6IlkifQ=="
  },
  ...
}
const configuration = {
  onAdditionalDetails: (state, component) => {
    // pass state.details to /connectors/adyen/initial-payment/finalize endpoint
  },
  ... // rest of the configuration object
};
Handle the redirect
Drop-in uses dropin.handleAction(action) to redirect the customer to the issuer page (the action.url from the /connectors/adyen/initial-payment response) to perform 3D Secure authentication.
const onAdyenSubmit = async (state, component) => {
  const {
    data: { paymentMethod, browserInfo, billingAddress }
  } = state;
  const { errors, responseData } = await submitAdyenPayment( // call /connectors/adyen/initial-payment
    paymentMethod,
    browserInfo,
    billingAddress
  );
  ...
  if (responseData.action) {
    component.handleAction(action); // Drop-in action handler
    return;
  }
}
Please note that the look and feel of the screen after the redirect flow is triggered is controlled by a card issuer.
Below you can see an example of what the authorization page may look like. But please remember that this page is managed externally, so it may look different than in the image below.

Example of the authorization page (after the customer is redirected)
When the customer completes authentication, the payment is authorized. The customer is redirected back to the returnUrl from your /connectors/adyen/initial-payment request. The redirect is via an HTTP GET and is appended with the Base64-encoded redirectResult.
GET /?orderId=12xy...&&redirectResult=X6XtfGC3%21Y.... HTTP/1.1
Host: www.your-company.com/checkout
To verify the payment result, make another API request with the redirectResult parameter:
- URL-decode the
redirectResult - Make a request to
/connectors/adyen/initial-payment/finalizeto finalize the payment.
Present the payment result
/connectors/adyen/initial-payment/finalize endpoint will return payment response if the payment was successful, or a proper error message if the payment was unsuccessful.
- Refused - The payment was refused. Ask the customer to try the payment again using a different payment method.
- Error - There was an error when the payment was being processed. Inform the customer that there was an error processing their payment.
Test your integration
Test both flows - native and redirect - to verify 3D Secure integration.
Native flow:
Use these test cards to test the native flow.
Redirect flow:
To test the redirect flow, set the enable3DSRedirectFlow to true in the /connectors/adyen/initial-payment endpoint first and then use these test cards (Mastercard is recommended).
Apple Pay setup
When the customer selects Apple Pay, they are presented with a payment sheet where they choose a card and optionally provide contact details and shipping address. Then they are prompted to authenticate the payment through Face ID or Touch ID.
Adyen does not currently support UnionPay cards through Apple Pay.
Apple Pay is available with specific issuers, on specific devices and browsers (Safari), and in specific countries. For details, please refer to the Compatibility section below.
Compatibility
Apple Pay is available with specific issuers, on specific devices and browsers, and in specific countries. For details, please refer to:
- List of issuers that support Apple Pay
- List of devices and browsers compatible with Apple Pay
- List of countries and regions where Apple Pay is available
Prerequisites
Make sure that you've completed the three prerequisites below.
1. Set up your server for secure communication with Apple Pay and upload a domain association file.
- All pages that include Apple Pay must be served over HTTPS.
- Your domain must have a valid SSL certificate.
- Note: you cannot use http://localhost to test.
- You need a domain association file. Please see the Certificate section below for details.
Please note that the domain association file is only required for production environment.
Certificate
You don't need to create your own Apple Pay certificate for your web integration because you can process payments through Adyen's Apple Pay certificate. The benefits of using Adyen's Apple Pay certificate are:
- A faster way to add Apple Pay to your integration.
- Less configuration required.
Use Adyen Apple Certificate:
A. Download and unzip the domain association file.
B. Host the domain association file with the name apple-developer-merchantid-domain-association on each domain you want to use (testing and live), including subdomains, under the following path:
/.well-known/apple-developer-merchantid-domain-association
The file must:
- Have
Content-Type: text/plainin the header. - Be externally accessible.
- Not be password protected.
- Not be behind a proxy or redirect.
- Be hosted with the Unix line ending.
See an example of a working domain association file.
C. Add the following IP addresses to your firewall's allow list:
- Allow Apple IP Addresses for Domain Verification
- Any IP originating from *.adyen.com
D. Your domain needs to be added to the allowed ones for Apple Pay.
2. Reach out to the Cleeng Broadcaster Success Specialists team to add the Apple Pay payment method to your account in the sandbox environment. Make sure that you provide both the payment method (Apple Pay) and a domain list where you will use an Apple Pay payment (with distinction: test/production).
It is recommended that you provide the full list of live and test domains so it can be added all at once as it will speed up the process.
3. Make sure that you've already built a Drop-in integration and proceed with Apple Pay integration.
Configure Drop-in
const applePayConfiguration = {
    amount: { // amount object from create payment session response
        value: 1000,
        currency: "EUR"
    },
    countryCode: "DE", // countryCode field from create payment session response
    configuration: {
     	merchantName, // shopperStatement field from create payment session response
      merchantIdentifier // merchantId value from configuration object for applepay (from create payment session response)
    },
    buttonType: “plain”, // The type of button to fit best with the terminology and flow of your purchase or payment experience. Allowed values: "plain", "buy", "donate", "check-out", "book", "subscribe", "add-money", "contribute", "order", "reload", "rent", "support", "tip", "top-up"
    buttonColor: “black” // The color of button to be displayed on the payment form. Allowed values: "black", "white", "white-with-line"
};
Include the applePayConfiguration object when creating a configuration object:
const configuration = {
  // ...  other required configuration
  paymentMethodsConfiguration: {
    applepay: applePayConfiguration
  }
};
For details of Apple Pay button styling options, please refer to Apple documentation.

Apple Pay payment method
Important
The Apple pay confirmation screen presents the payment value, which is taken from the payment session. If the customer applies a coupon you should:
- unmount the existing Drop-in,
- create a new payment session,
- mount a new Drop-in instance.
Thanks to that, the customer will see the proper price on the Apple payment sheet.
If theamountobject will be different than the one received in the payment sessions response, then the payment will not succeed.
Test your integration
Please refer to Apple's Developer website for a list of test cards and instructions how to add these to your test device.
- You need an Apple Developer account to create an Apple Pay sandbox environment and test payments. This is also applicable if you're using Adyen's Apple Pay certificate.
- Apple Pay will be displayed only on Safari browser and only if a test Apple Pay wallet is detected.
When you are ready with your integration, reach out to the Cleeng Broadcaster Success Specialists team to turn on the Apple Pay payment method on production.
Google Pay setup
With Google Pay, customers can make purchases using credit or debit cards stored in their Google account.
When a customer pays with Google Pay on websites, Google Pay shows a payment sheet where they select their preferred card payment method and confirm their purchase.
Availability
For more information on Google Pay availability, refer to:
- List of payment methods that support Google Pay.
- List of countries where you can use Google Pay.
- List of supported browsers.
Supported networks
Our integration supports the following card networks:
- American Express: Supported globally.
- Discover: Supported in the US.
- Elo: Supported in Brazil; you must have a local business entity in Brazil to offer this to customers.
- Interac: Supported in Canada; you must have a local business entity in Canada to offer this to customers.
- Maestro: Supported in the EU and Brazil.
- Mastercard: Supported globally.
- Visa: Supported globally.
When customers select Google Pay, the Drop-in presents the Google Pay payment sheet where customers choose a card they want to use. If customers select a card that requires 3D Secure authentication, Drop-in also handles redirecting customers to another website to complete the verification.
Prerequisites
- Reach out to the Cleeng Broadcaster Success Specialists team to add the Google Pay payment method to your account in the sandbox environment.
- Make sure that you've already built a Drop-in integration and proceed with Google Pay integration.
Note:
When you are ready with your integration for production release, you'll need to reach out to the Cleeng Broadcaster Success Specialists team and send a list of domains where you will use Google Pay (production only) and screenshots showing the purchase flow for Google website verification.
Configure Drop-in
Load the Google Pay API JavaScript library
We recommend that you preload the Google Pay API JavaScript library, by including the following script on your checkout page:
<script src="https://pay.google.com/gp/p/js/pay.js"></script>
Required configuration
const googlePayConfiguration = {
    amount: { // amount object from create payment session response
        value: 1000,
        currency: "EUR"
    },
    countryCode: "DE", // countryCode field from create payment session response
    environment: "TEST", //Set this to PRODUCTION when you're ready to accept live payments
  	configuration: {
     	merchantName, // shopperStatement field from create payment session response
      gatewayMerchantId, // gatewayMerchantId value from configuration object for googlepay (from create payment session response)
      merchantId //  merchantId value from configuration object for googlepay (from create payment session response)
    },
    // optional parameters
  	buttonType: "buy", // allowed values: "buy", "book", "checkout", "donate", "order", "pay", "plain", "subscribe",
  	buttonColor: "white", // allowed values: "white", "black", "default",
  	buttonLocale: "nl", // allowed values: "nl", "en", "ar", "bg", "ca", "cs", "da", "de", "el", "es", "et", "fi", "fr", "hr", "id", "it", "ja", "ko", "ms", "nl", "no", "pl", "pt", "ru", "sk", "sl", "sr", "sv", "th", "tr", "uk", "zh",
  	buttonSizeMode: "static", // allowed values: "static", "fill"
};
const configuration = {
  // ...  other required configuration
  paymentMethodsConfiguration: {
    googlepay: googlePayConfiguration
  }
};
For details of Google Pay button styling options, please refer to Google documentation.
Test your integration
To test Google Pay, log in to a Google account and add a real card, not a test card. When you make a test payment, the card number is automatically mapped to Adyen test card number starting with 4111, so the real card is not charged.

Google Pay payment method
Note that in the live environment Google Pay will only be available if:
- The customer is logged in to their Google account.
- The customer has at least one valid payment method on their Google Pay account.
Once Google Pay is successfully tested, proceed with the Google website verification step.
Google website verification
The verification is done by Google before giving access to production use. The verification process might take about two days. Once the verification is successful, Cleeng can turn on Google Pay for you.
To prepare for Google website verification, you need to provide the screenshots showing the purchase flow.
You need to provide the following screenshots:
- Item selection screen - when a customer is browsing for an offer
- Pre-purchase screen - when a customer is ready to make a purchase
- Payment method screen - when a customer selects Google Pay as payment method
- Google Pay API payment screen - when a customer is shown the payment info they have saved to Google Pay
- Post-purchase screen - when a customer has successfully purchased an offer.
Please also refer to Google Brand guidelines.
When you are ready with your integration for production release, reach out to the Cleeng Broadcaster Success Specialists team and send a list of domains where you will use GooglePay (production only) and screenshots showing the purchase flow.
Once it is verified and accepted by Google, Cleeng will turn on Google Pay on production for you.
iDEAL setup
iDEAL is available only for customers in the Netherlands and it is the most popular online payment method there. It allows customers to pay online through their bank.
When the customer selects iDEAL as their payment method, they are presented with a list of banks where they can select their own bank and are redirected to a webpage hosted by their own bank.
Prerequisites
- Reach out to the Cleeng Broadcaster Success Specialists team to add the iDEAL payment method to your account.
- Make sure that you've already built a Drop-in integration.
Important
- iDEAL payment method is available only for customers that are in the Netherlands.
- By default, iDEAL supports payment with a minimum value of 0.10 EUR. It is planned to add support also for zero-amount transactions that may be useful for trials, 100% coupon codes, and adding payment details through My Account.
We recommend adding support for transactions for authentication purposes (zero-amount), please refer to this tutorial. In such a case, please also remember to subscribe to the refundPayment webhook, otherwise refunds will not work.
Configure Drop-in
There are no additional required parameters that should be passed to Adyen Drop-in.
Optionally, you can customize the iDEAL payment method by using the following parameters:
| Parameter name | Description | Default |
|---|---|---|
showImage | Optional. Set to false to remove the bank logos from the iDEAL form. | true |
issuer | Optional. Set to an iDEAL issuer ID to preselect a specific bank. For issuer IDs refer to Adyen documentation. | |
highlightedIssuers | Optional. Set to the iDEAL issuer IDs for banks you want to show on top of the dropdown menu. | |
placeholder | Optional. The string you want to show as the dropdown menu text. Custom translation configuration overrides this value. | ‘Select your bank’ |
Add optional configuration into a configuration object. The following example shows how to configure Drop-in to show the bank logos, and preselect Revolut.
const idealConfiguration = {
   showImage: true,
   issuer: “0805”,
   highlightedIssuers: [“0805”, “0721”],
   placeholder: “Select bank”
};
If you have created an idealConfiguration object, include this when creating a configuration object:
const configuration = {
  // ...  other required configuration
  paymentMethodsConfiguration: {
    ideal: idealConfiguration
  }
};
Test your integration
Different test banks for testing iDEAL payments are provided. You can test for payments with different Adyen statuses: Cancelled, Pending, or Refused. In Cleeng you will see these payments either as authorized or rejected.
In order to test a given scenario, select a corresponding test bank name, e.g. "Test Issuer Cancelled" to simulate a cancelled payment situation (see the screenshot below for the illustration of what it might look like).
We recommend that you test each scenario before you go live.
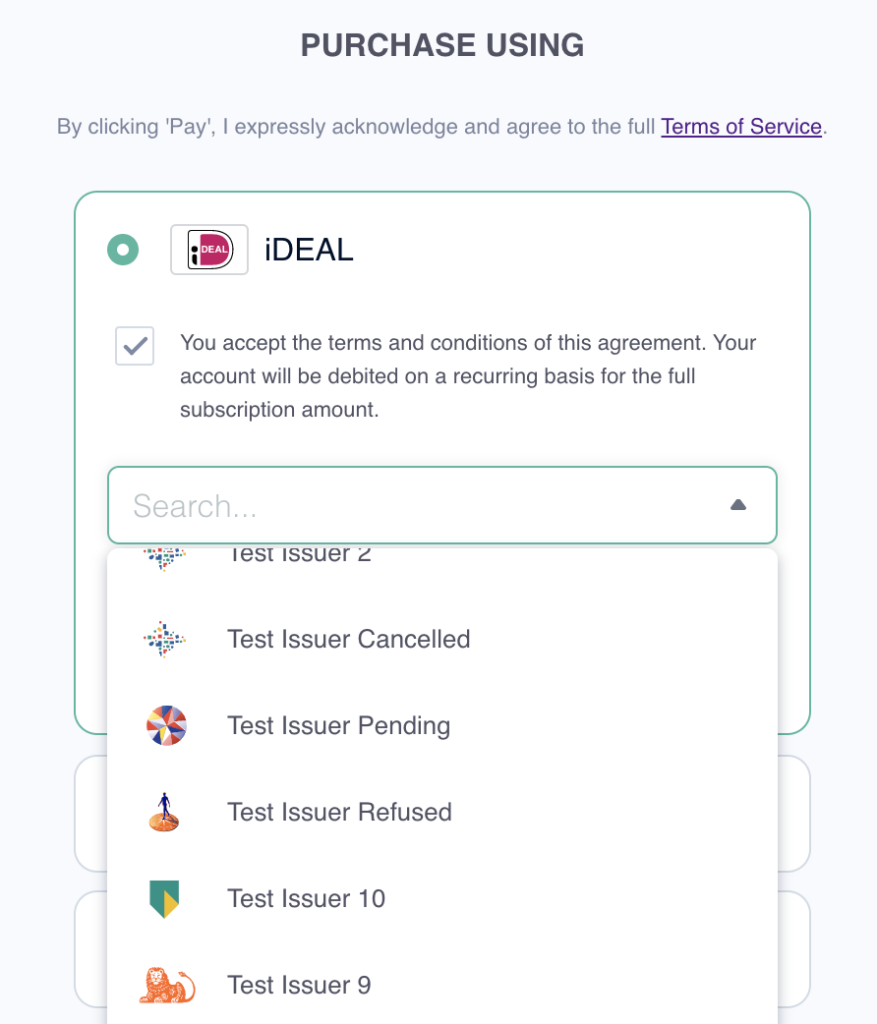
Example of iDEAL Test Bank Names
Sofort setup
Sofort is a popular online bank payment method in Europe. It allows customers to use their own online banking details to make payments.
When the customer selects Sofort as their payment method in the checkout, they are presented with a button, which redirects them to an external site where they can select their bank.
Prerequisites
- Reach out to the Cleeng Broadcaster Success Specialists team to add the Sofort payment method to your account in the sandbox environment.
- Make sure that you've already built a Drop-in integration
Important
- Sofort payment method is available only for customers that are in one of those countries: Austria, Belgium, Finland, France, Germany, Italy, Spain, The Netherlands.
- By default, Sofort does not support transactions for authentication purposes (zero-amount) that may be useful for trials, 100% coupon codes, and adding payment details through My Account.
We recommend adding support for such transactions, please refer to this tutorial. In such a case, please also remember to subscribe to the refundPayment webhook, otherwise refunds will not work.
Configure Drop-in
There are no parameters that should be passed to Adyen Drop-in.
Test your integration
Sofort does not have a test environment so you are redirected to the Sofort live environment even when making a payment from the Adyen test environment.
You can test successful and rejected payments in EUR for Sofort. For other scenarios, use real payment details and small amounts in your live environment.
To test your integration, use the details below:
| Bank Name | Account Number | Country | PIN | TAN |
|---|---|---|---|---|
| DemoBank | Use any value | DE | Use any value | Follow the instructions |
Warning
If you use a different bank name (live data), it will initiate a real payment. Please note that this payment will not be transferred to your account, it will be lost. It is not possible to reverse or refund such a payment.
Testing a successful payment
To test a successful payment, follow the steps:
- Select Sofort payment method (see the example screen below)

Example of Payment with Sofort
- After redirection to the Sofort website, under Bank name, choose DemoBank (available only in Germany).
- Select Next.
- Enter any test login details for Account number and PIN.
- Select Next.
- Select an account.
- Select Next.
- Enter any test TAN (Transaction Authentication Number), e.g. 12345.
- Select Next.
- Check if the transaction was successful. Go to the customer account details page in the dashboard and check if the customer has a transaction and active subscription.
Testing a rejected payment
Please note that for Adyen - if a customer cancels a payment, then the transaction is treated as rejected.
To test a rejected payment, follow the steps:
- Select Sofort payment method.
- After redirection to the Sofort website, under Bank name, choose DemoBank (available only in Germany).
- Select Next.
- Select the X icon.
- Select Cancel payment.
- You should present a screen similar to the screenshot presented below, and the customer should not have an active subscription (go to the customer account details page to check).
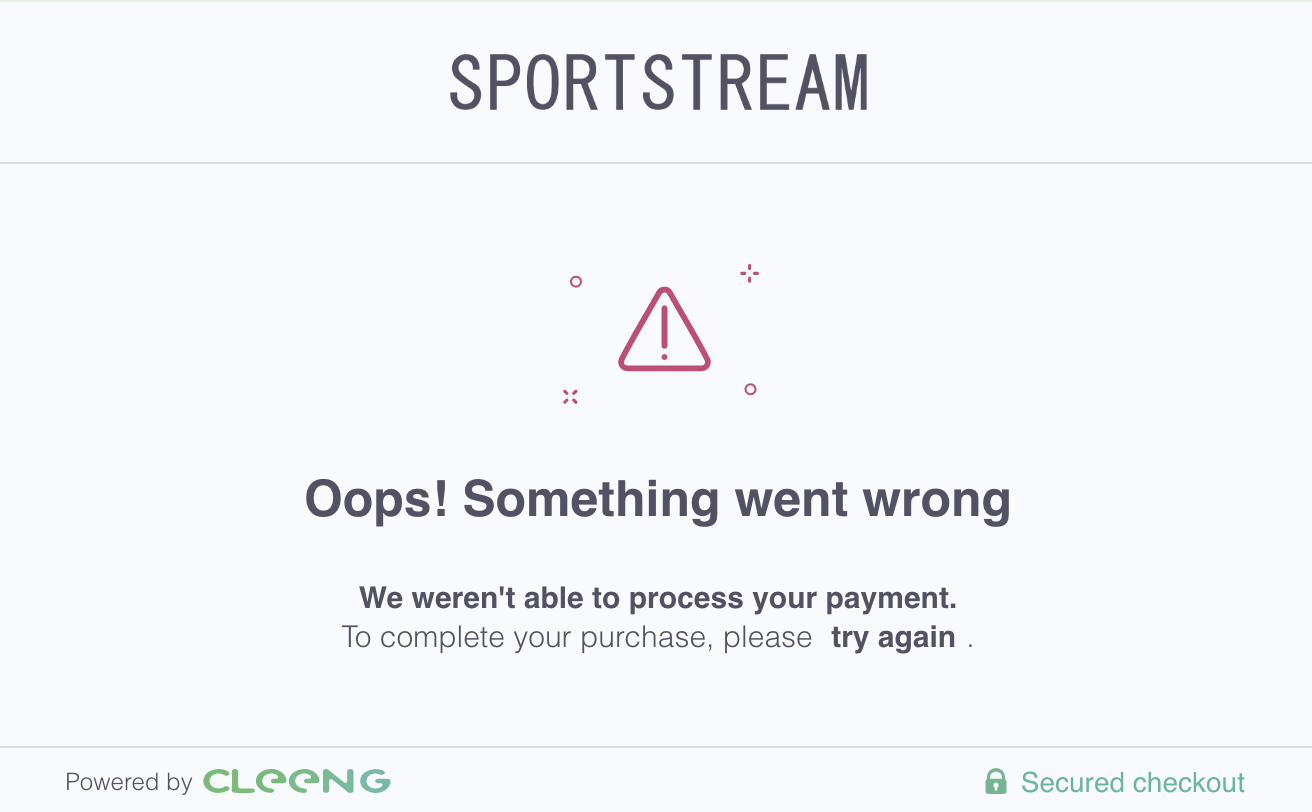
Payment with Sofort - Example of Error Message
Up Next
Congratulations! Now, you're ready to accept payments with Adyen.
If you're interested in more options, consider the following:
- If you want to find out about how to control which payment methods are displayed to your customers - see filtering of payment methods.
- Since not all payment methods support zero-amount transactions for authentication purposes, you might want to see how you can support it with Cleeng in Adyen Authentication Transactions.
- You can continue to PayPal Payment Setup if you want to offer payments with PayPal Express, too.
- Go to Payment-free Setup if you would like to offer free content.
- If you're happy with the payment setup but wish to make the user experience for your customers even better, you can go on and implement "My Account" feature, by following My Account-Web use case.
Updated 4 months ago